
$1,470 average price
The RE Amemiya section on lights was written by Jim LaBreck and posted on the forum.
I (Steve Cirian) supplemented it with a few photos in addition to the ones Jim posted.
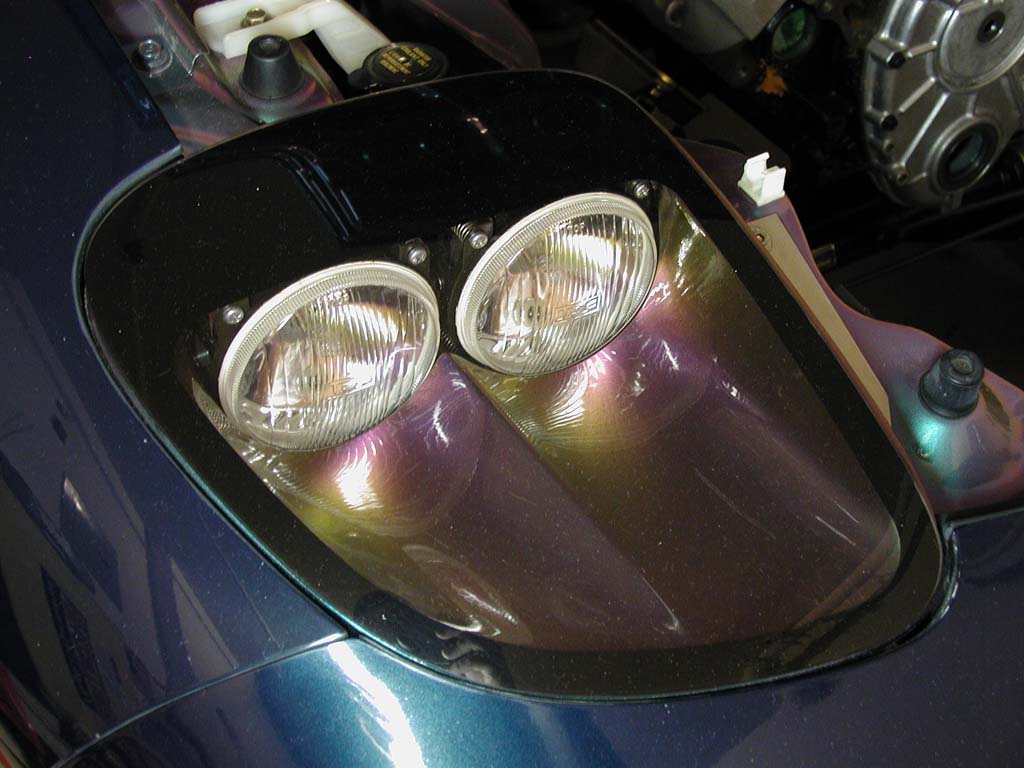
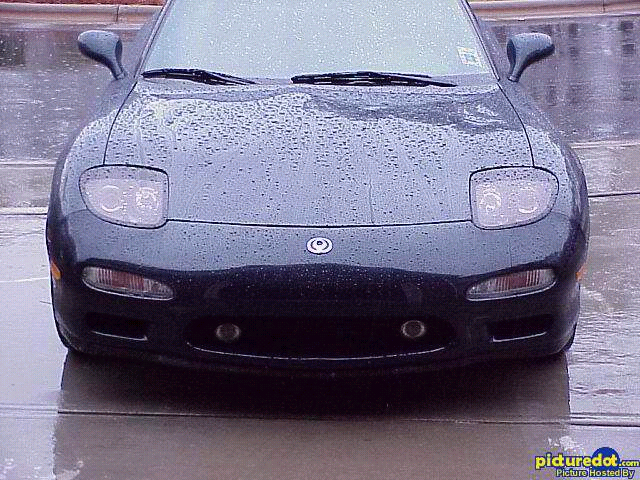
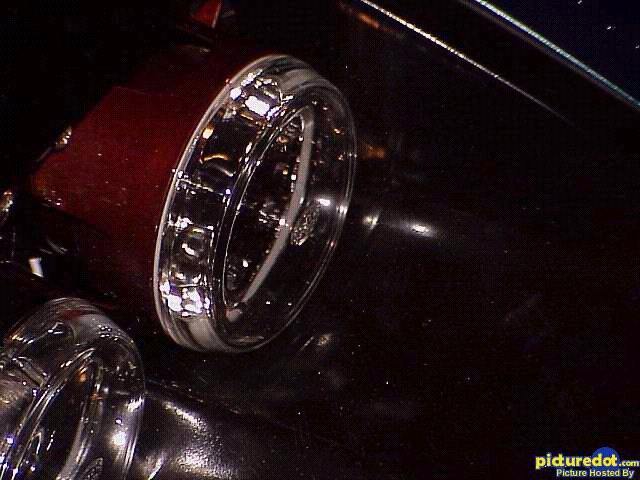
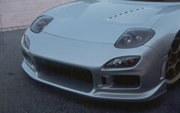
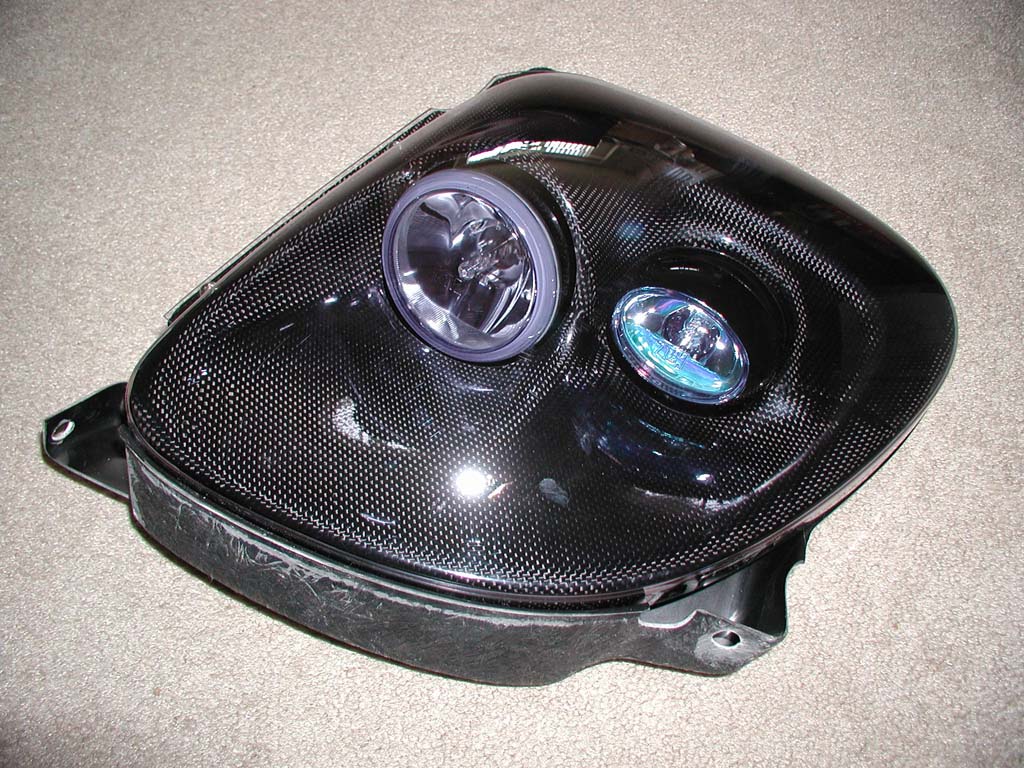
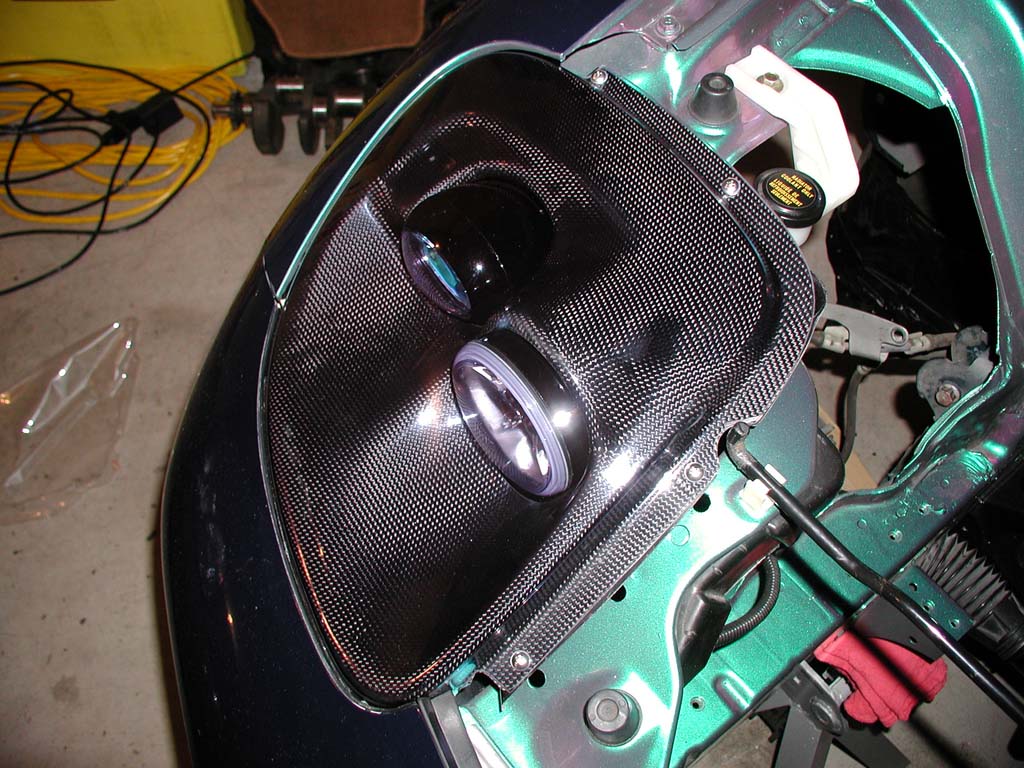
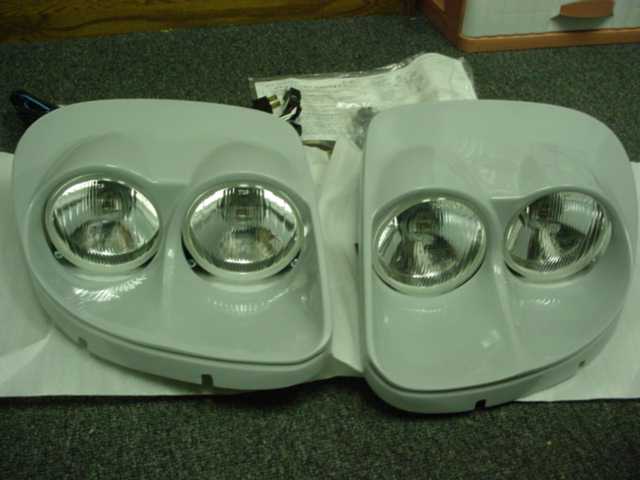
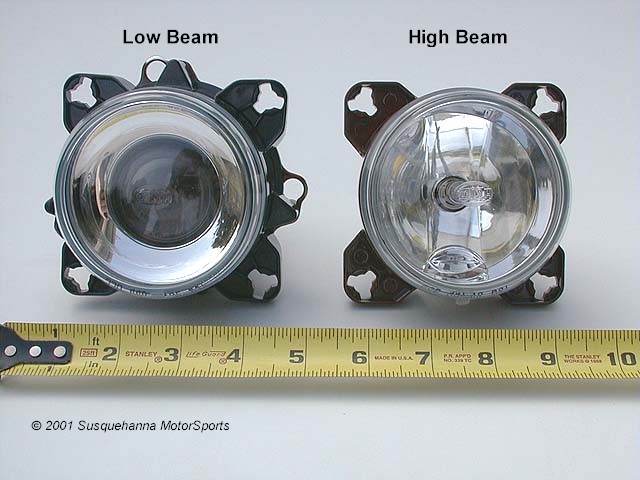
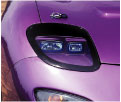
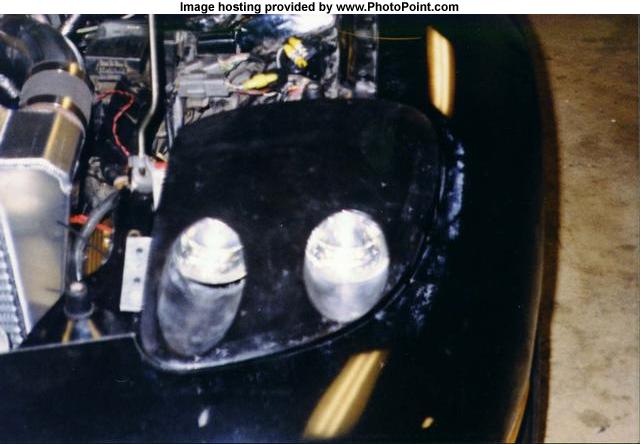
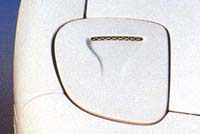
The following is a close-up of the RE sleek light kit. This kit two pods, two covers, 4 lights
mounted in pairs on brackets, and various fasteners and brackets for mounting the pods in
the car. Also included is a transformer which plugs into one of the stock headlight plugs
for turn-on, but requires wiring for power and ground for itself also.
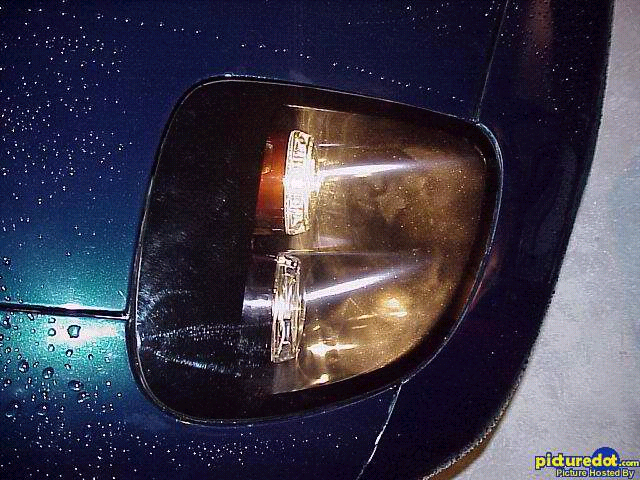
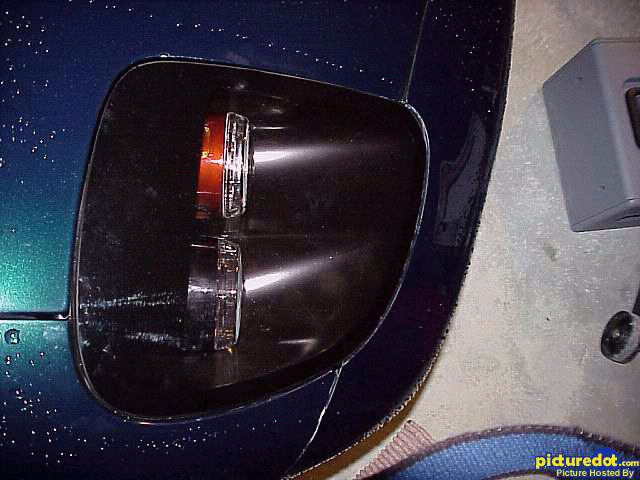
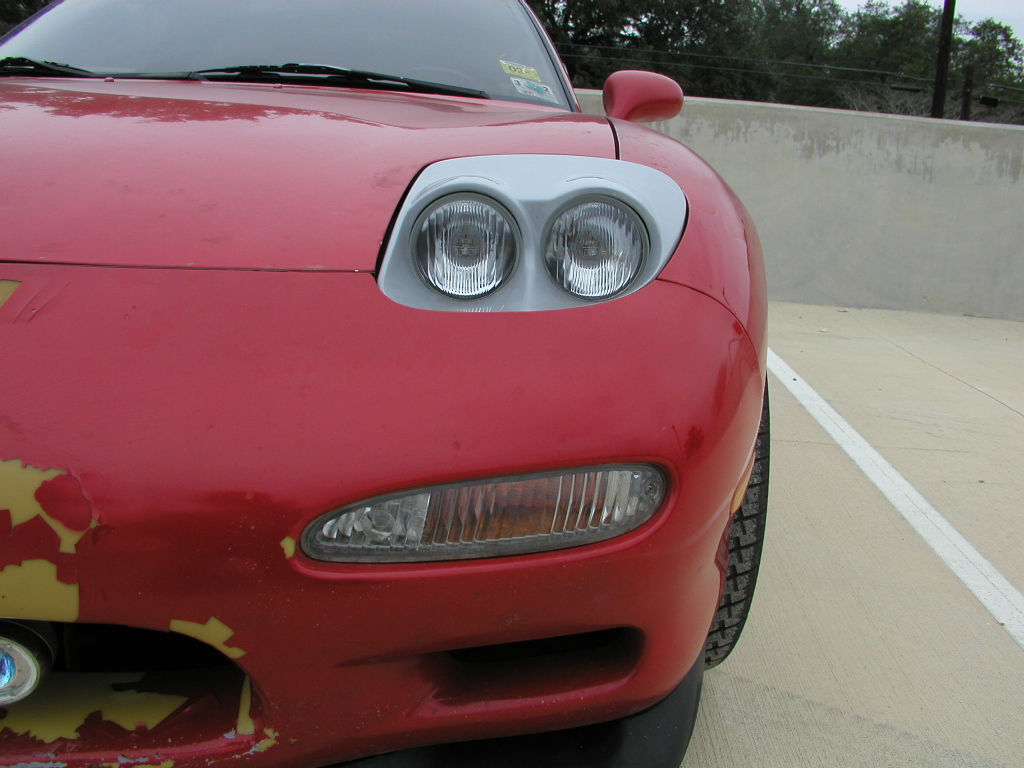
As you can see in the next image, the pod clips the lower edge of the lights, and
limits the amount of output. Looking at the lights from a level plane, the lower 1/4 or
more of each light is eclipsed by the pod. In order to have a flush mounting cover, this
was apparently necessary.
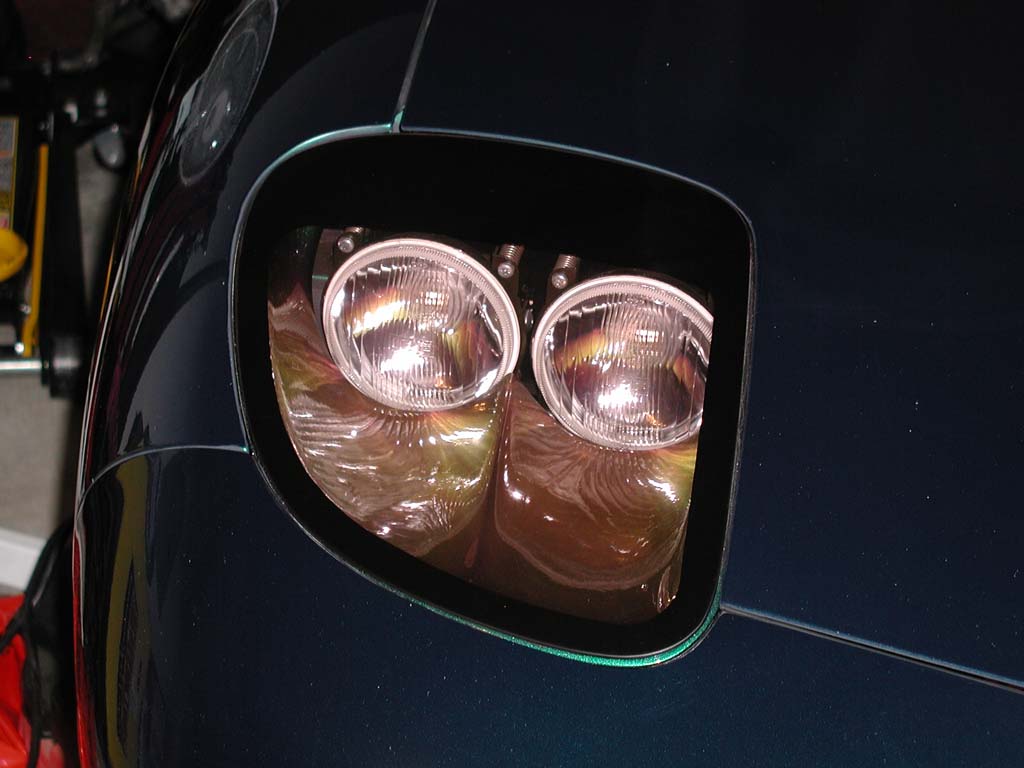
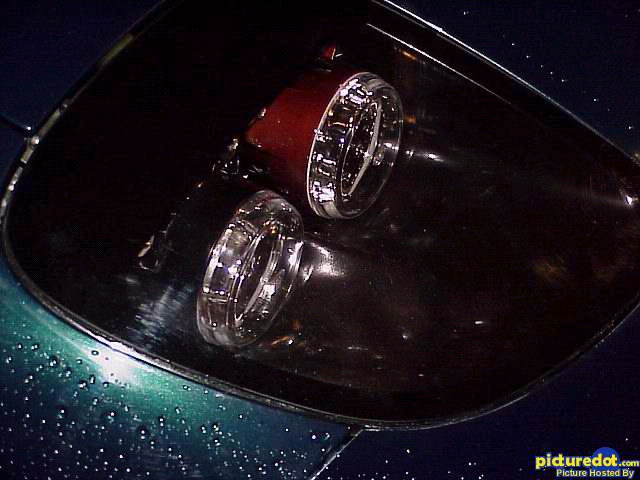
The lights take H3 bulbs, and come with 55w bulbs which can be replaced with higher
wattage (100/110w) H3 bulbs. To the best of my knowledge, there is no H3 HID conversion
kit, and the shallow depth of the lights makes them less than ideal for such a conversion
anyway.
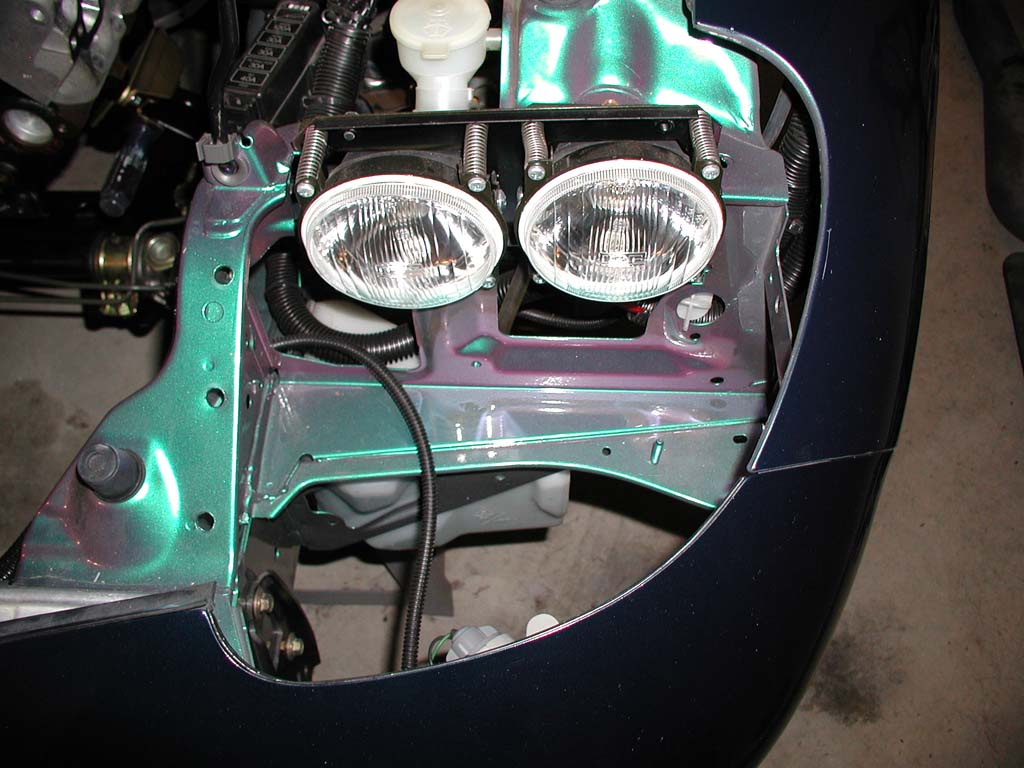
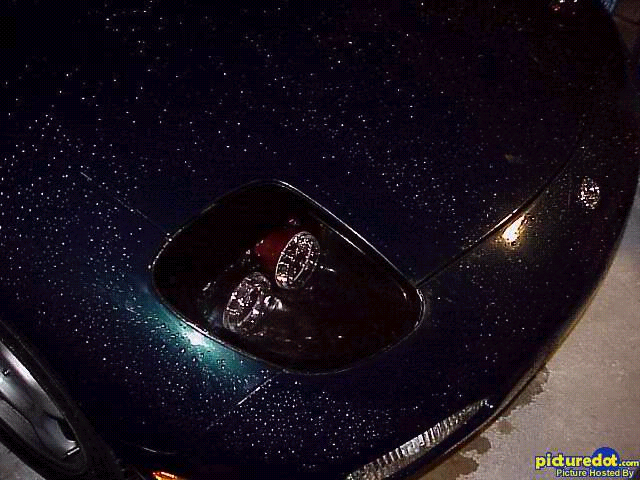
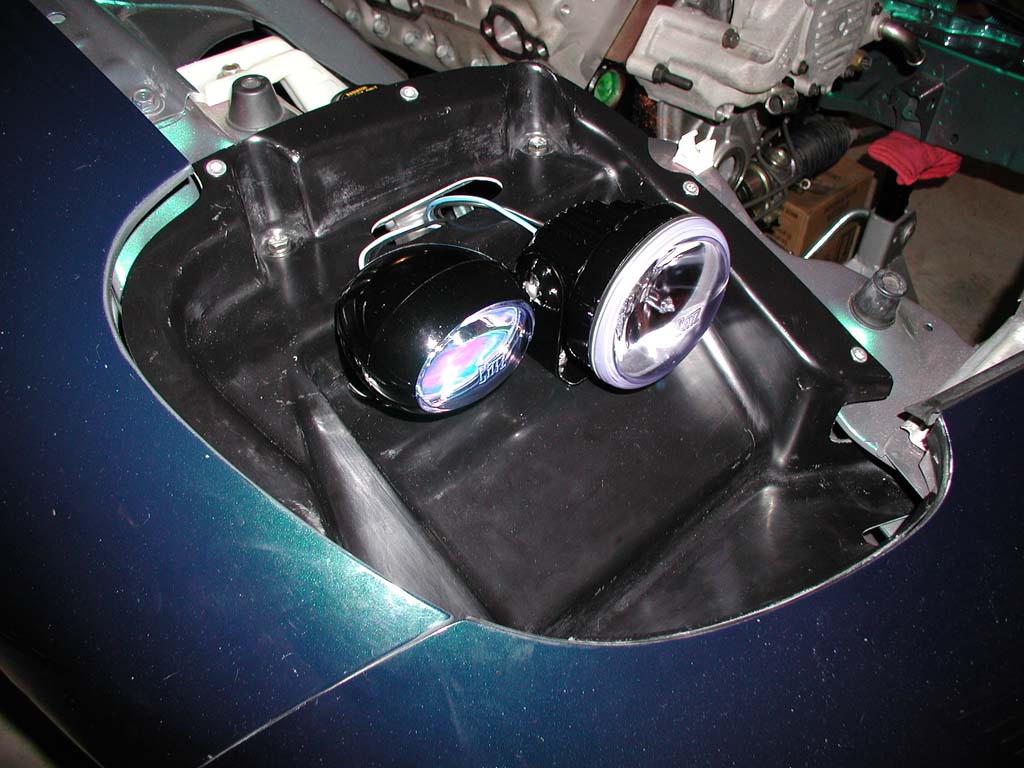
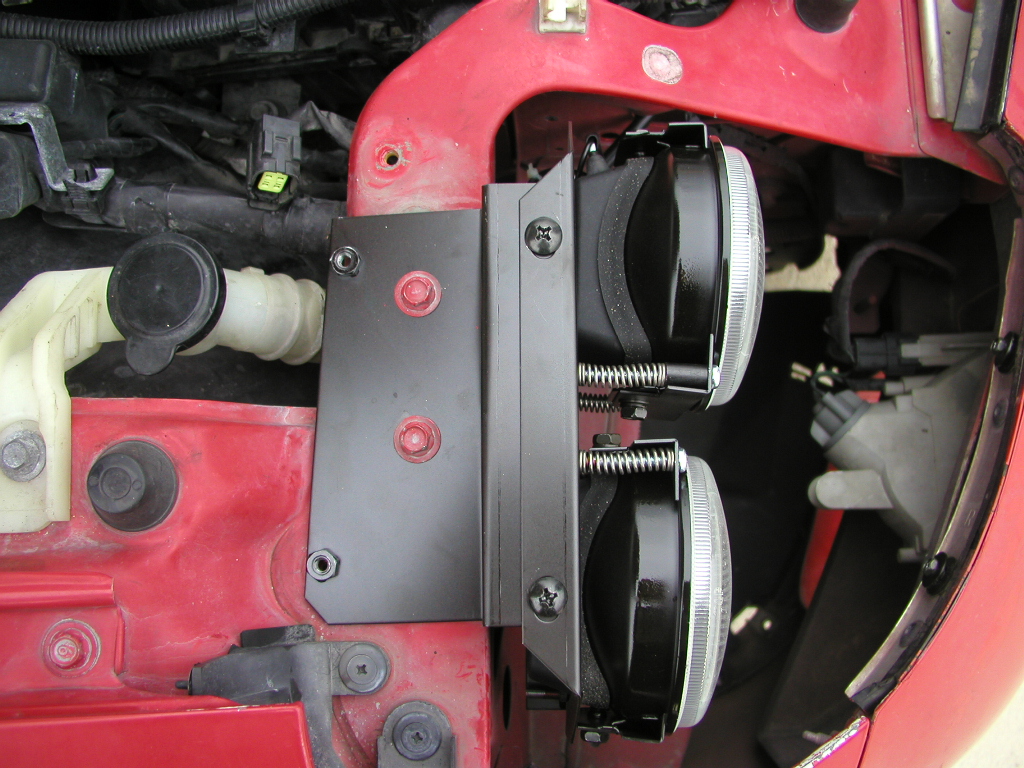
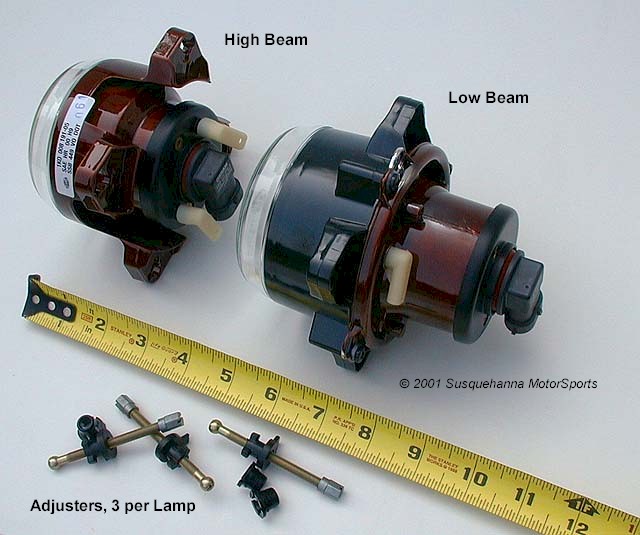
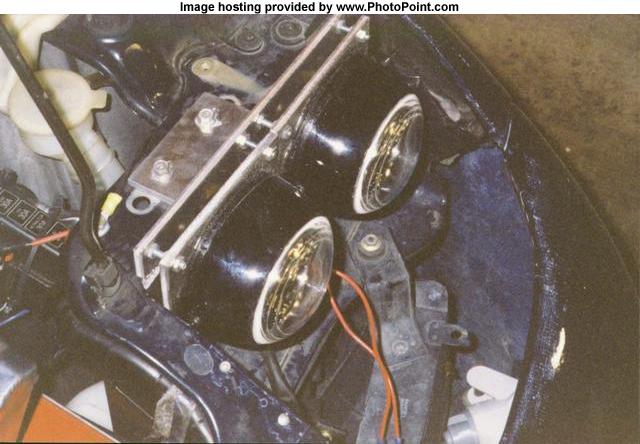
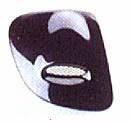
Above you can see the light bracket assembly. It bolts to the upper OEM headlight
position with two 10mm bolts, and has a third screw and bolt (not shown in this picture)
which attaches just beneath the wiring harness as it passes under the hood rod mount.
As you can also see, there are three large holes that need to be drilled to fasten the
engine bay side bracket for the pods. The kit comes with rubber compression nuts that
insert in these holes (not shown) which expand as the fasteners are tightened. The
hardware is only partially stainless, so exposure to weather will affect the appearance
of the washers, and may stain the brackets with oxidation.
In the picture above, we see the major downside to the RE Amemiya kit. It requires
that a large section of the bracing around the light area be cut in order to mount the
RE lighting. The roughly rectangular section that you can see (or can't see, rather) is
the area that must be cut out. At the time that I installed my RE kit, it was the only
sleek light kit available in the United States. If I had it to do over again, I would
not have selected this kit for this reason.
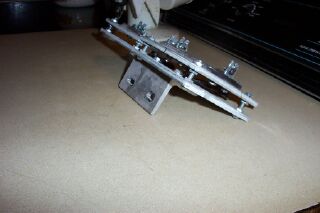
The RE pod mounts with three brackets. The inner bracket, for which the three holes
are drilled in the support is the largest. A small, narrow bracket at the back edge of
the pod bolts under the foremost fender bolt (10mm) behind the pod. The final bracket
is on the outside edge of each pod, and fastens using a very difficult system which
passes through a pre-existing hole in the fender/bumper bracing. In order to reach
this hole, the wheel well liner must be removed. In other words, if you ever have to
replace a bulb, adjust the focus of the lights, or remove the pods to wipe out
condensation, the fender liner must be removed. This is another reason why I would
not recommend this kit.
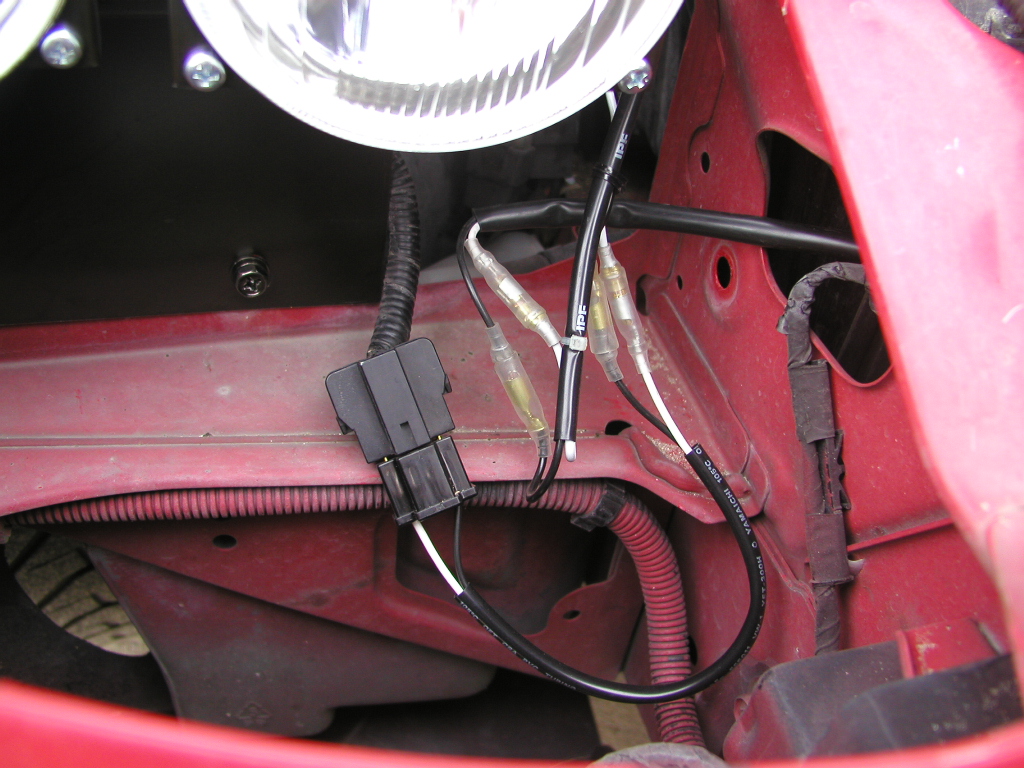
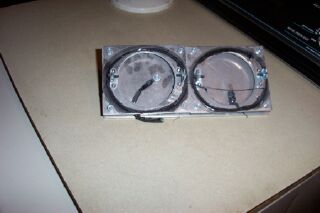
The adjustment for each light is a bolt at each corner (4 total) which passes through
a small spring. The problem is that at least with my kit, (and my car is absolutely
straight) each of the bottom adjustment bolts had to be bottomed out in order for the
glass lense of the light to clear the headlight pod. This left very little (if any) room
for real adjustment of the lights.
Finally, the pods themselves are an issue. The Lexan cover must be secured to the pod
using the supplied "gunk" from RE Amemiya, but I elected to use standard windshield
urethane (black). Once on, it's not coming back off easily, even if you can find a
replacement panel. I've seen others with their covers secured with screws, which, while
it may give easier access to the lights, does not look good. In addition, the pods are
prone to fogging in wetter climates.
General experience with this kit indicates that the light output with the kit
as-delivered is poor. Upgrading to higher wattage bulbs is an option, but may tax the
wiring and may cause the Lexan covers to discolor or warp from the heat generated. The
Lexan covers are prone to scratching, something to keep in mind if you don't always
wash your own car and can't pay special attention to keeping them in good condition.
Editor's note: The rest of the RE Amemiya section is from mmaragos, as posted
on the forum.
From: mmaragos
Finally took the time to install the Hellas that I had sitting around for the past
couple months.
These bad boys...
http://catalog.com/susq/hella/90mm.htm
Took some modification of the RE frame, but with some encouragement, the Hellas fit
(barely). Still need to secure them a little bit better (thinking on that one) and I
need to aim them.
Just trying them out in the garage they look to give a much better spread of light.
The high beams are blinding. Definitely better than the IPFs that come with the kit.
Whomever comes up with a light kit...use these lamps!
Each headlamp is $65.95 with the connector (from the link that I listed previously).
The connectors are necessary unless you happen to have some that will fit the H9 bulb.
I would have to say that the RE kit is worse than the stock headlamps. The IPF lamps
that they used don't put out much of a beam, but are almost a fog light type spread. I
never have really found much info on the IPFs, but I don't think that these were meant
to be a headlamp for a car.
The Hellas sit a little further forward, they are deeper than the IPFs. They also
protrude back further in the RE frame (which I had to mod). I need to spend some time
on them this weekend. I take a couple picks and post.
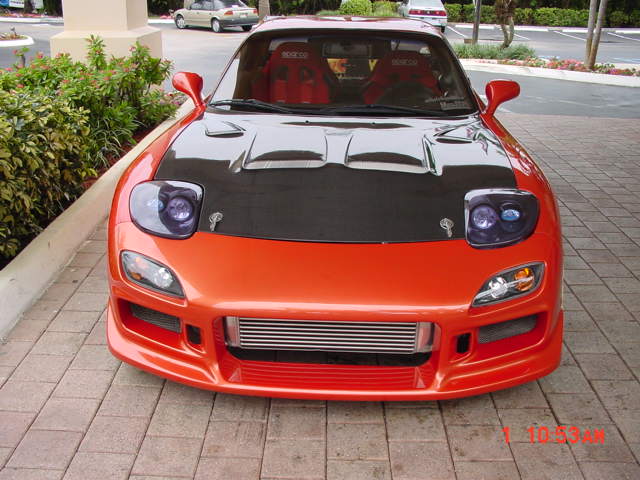
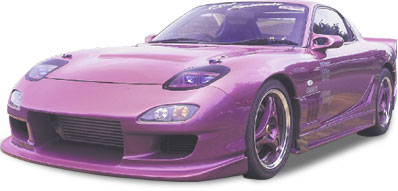
$825 average price
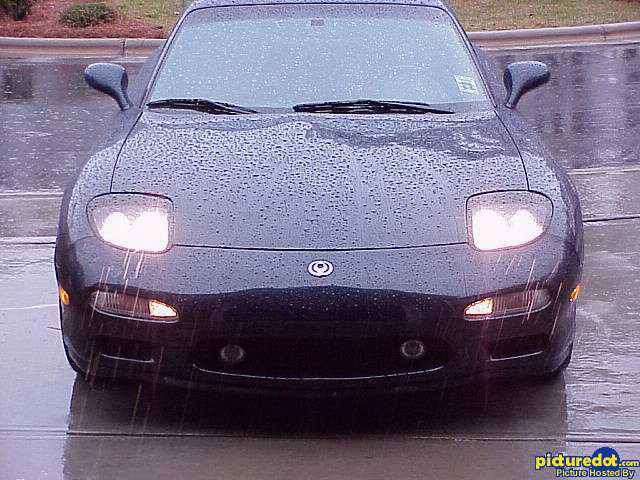
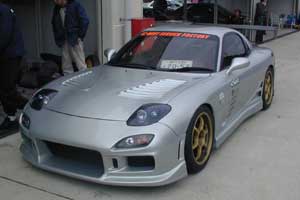
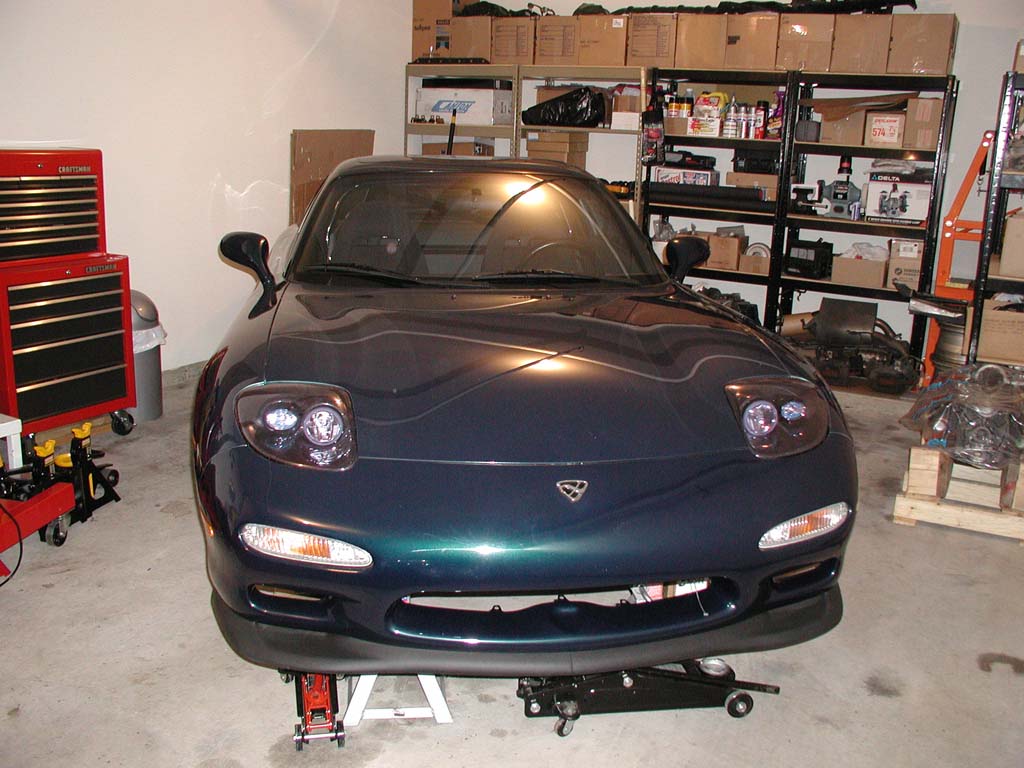
This RE Amemiya kit looks like it replaces the stock squarish lights with dual round
ones.
average price?
The C-West section on lights was written by Jim LaBreck and posted on the forum.
I (Steve Cirian) supplemented it with a few photos in addition to the ones Jim posted.
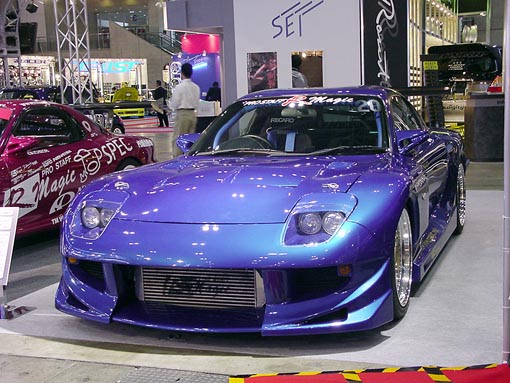
As you can see in the above pictures, the appearance of the C-West sleek light kit
is an improvement over the RE kit. The pod covers are in two parts, one made of carbon
fiber and one of Lexan.
The pod itself is fiberglass, and bolts to the same two 10mm bolts which the RE
Amemiya light brackets bolt to at the rear of the pod. In the front, there are two
more fasteners. One uses one of the 10mm nuts which hold the front bumper on to fasten
that corner of the pod, and the other uses a supplied 12mm (?) Allen bolt that
attaches through the pod to an existing threaded nut on the inside edge of the
support structure above the radiator. The pods are easy to install.
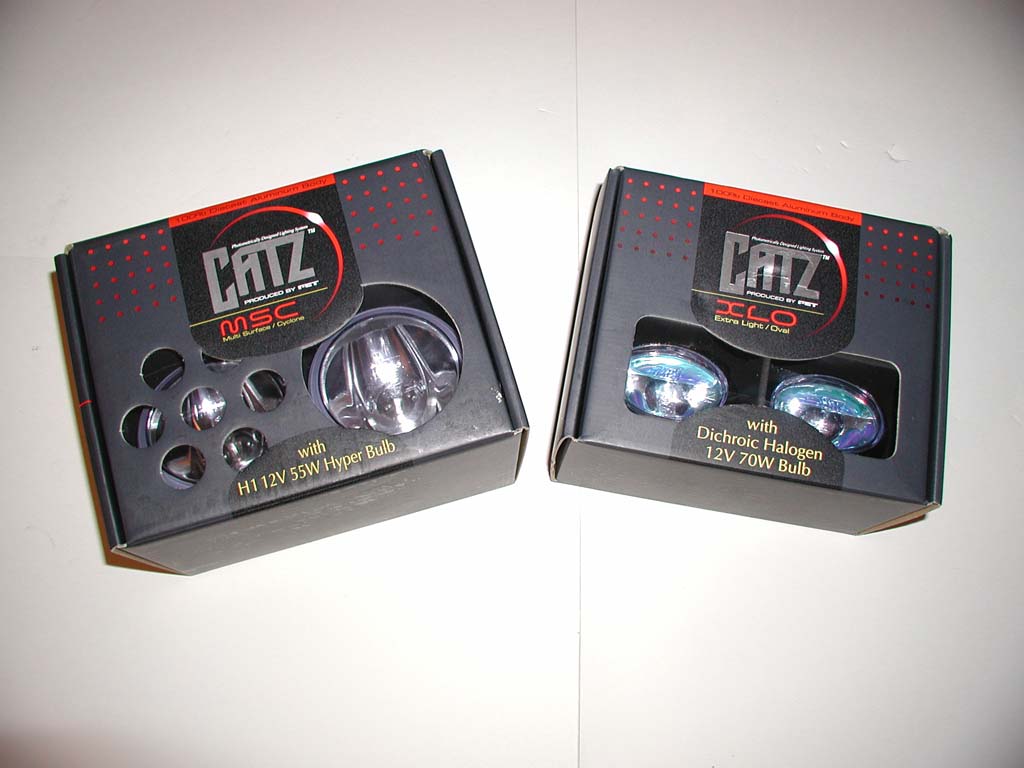
As you can see in the picture above, the C-West kit uses CATZ fog lights for its
lighting. Wiring the lights is identical to wiring up a set of fog lights. A relay
will be required for both "low" and "high" beams to switch power to the lights when
the headlight switch is on. Wiring is a little more difficult than the RE kit because
there are two sets of lights to wire, no plug-n-play adapter that plugs into the stock
headlight plugs (splicing is required), and no relays included.
Above you can see the XLO and MSC CATZ fog lights in their boxes. These are fog
lights, not DOT headlights, and they are not legal for use on public highways. If you
are at all in doubt, you should check your local legislation because you can be
ticketed for these lights.
Light output is superior to the RE kit, but that's not saying much. Output meaning
quantity, of course, not quality in this case. The lights will be brighter, but because
they're still not a true headlight, the do not have a proper low or high beam pattern.
Oncoming drivers may be annoyed by your lighting array, so be prepared.
In addition, the lighting can appear purplish, and even the Lexan covers have a
light smoke/purple appearance, so these lights may draw the attention of law
enforcement. You have been warned.
Above you can see the carbon fiber pod cover, the nicest part of the kit. The fit
is excellent, and the appearance speaks for itself. If the kit had better lighting,
this would be my favorite kit.
In the picture above, you can see (or not) the Lexan cover which mounts over the
carbon pod cover. The "clear" cover attaches using four screws, two at the rear and
two at the side (shown) with Nylon washers between the screw heads and the Lexan.
The upside of this mounting scheme is that you can easily remove the cover for
replacement, to wipe them dry (haven't heard that fogging is as much of a problem,
but it could be depending on conditions), or adjusting the lights. The carbon fiber
pod pops right off and you can move the lights up or down, but not left to right.
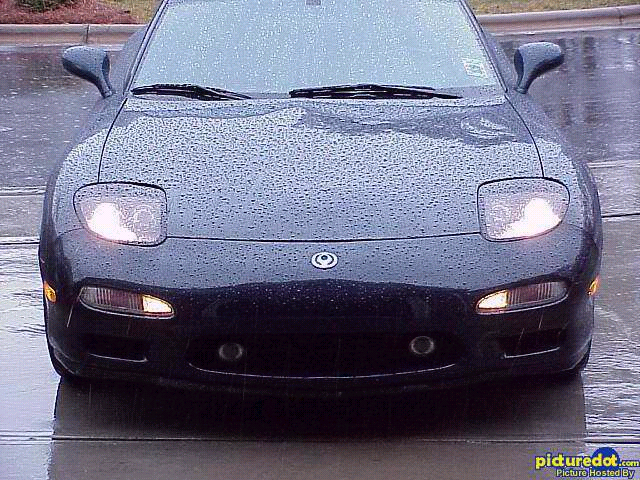
And in the last picture above, you can see what the kit looks like from the
front of the car.
The East Bear section on lights was written by Jim LaBreck and posted on the forum.
I (Steve Cirian) supplemented it with a few photos in addition to the ones Jim posted.
Unfortunately, I don't have my East Bear kit yet, so I'm going to have to
"borrow" someone else's pictures for illustration purposes. (Thanks SARX7 and
Phase2!)
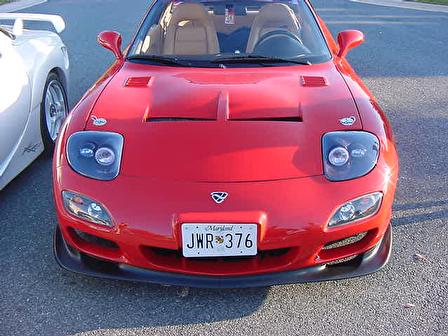
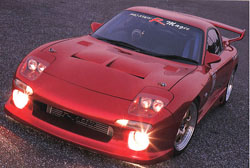
Above you can see the East Bear pod. It is similar in appearance to the RE kit, but
you'll notice that it does not have a Lexan cover, and that the bulges in the pod
indicate that the lights sit higher in the pod. There are two benefits to this. First,
the East Bear kit does not require cutting sheet metal, even though the lights are
almost identical to the RE lights. Second, the lack of a cover can be a benefit, in
that there is no chance of fogging or scratching.
As you can see above, the light pods protrude slightly above the level of the hood.
Compare this to the C-West kit (above) in which the Lexan covers have a very noticeable
bulge. This is more obvious from the side and not as easy to detect from the front,
however.
As you can see in the next picture below, the East Bear kit bolts in the same spot
as the RE kit, but does not require cutting sheet metal. The lights sit farther forward
(which explains why the pod must bulge above the hood line) and as can be seen in this
picture, the spring/bolt adjustment hardware is the same as on the RE kit. The lights
themselves are the same, using H3 bulbs, which have all the same problems. The lights,
however, are not eclipsed by the lower edge of the pod as is the case with the RE kit.
The mounting of the pod does not require the removal of the wheel well liner, but
the two mounting slots on the front of the pod do require that you install fasteners
on the bumper reinforcement bar beneath the light area. I have yet to experience this
for myself, so I cannot comment on the difficulty involved with installing or removing
the pod, should that be necessary.
The East Bear wiring is also vastly improved. It is truly plug-n-play and plugs into
the stock wiring harness without cutting and splicing. The required relays are included,
and wiring is straight forward.
But the best part about the East Bear kit is that it can be more easily adapted to
using "proper" lighting. The Hella DOT lamps shown below have true low beam and high
beam patterns and are legal for use on public roads, so no fear of tickets and a better
dispersion of light. Both high and low beams use an H9 bulb.
Adjustment is from the rear, like a standard headlight, so it is possible that the pod
won't have to be removed to adjust the focus of the lights.
Hella DOT low beams : Average cost - $60 ea.
Hella DOT high beams: Average cost - $60 ea.
H9 conversion plugs - $5.95 ea.
I've purchased two of each and the H9 plugs and will provide a write up when I have a
chance to see how they work out.
No info yet...
No info yet...
These appear to replace the big squarish stock light.
No info on these...
Unkown lights - let me know if you have info on these. They might be RE Amemiya,
as I believe they make these with the intake vents as shown here. But the rest of
the body kit doesn't look like RE stuff.
Kevin Wyum is no longer producing parts for the cars, but I am including his light kit
here in case anyone is interested. --Steve
Date: Fri, 14 Nov 1997 01:42:18 -0600 Since people asked about it in the past I thought I would mention that I
finally have my first spare headlight kit. These are the new molded
covers etc. Looks much better than the assembly I had on my car. I
assume Kevin Tan will have some pictures on his Web site in the near
future as his car is being painted. These are 4 PIAA 910's, look
similar to the 3000GT VR4 lights.
It does require final fitting by the owner, such as a little sanding on
the underside to achieve the fit that each person wants. Otherwise just
standard body prep and painting the appropriate color. They come in
black gellcoat. Price is $900. It plugs into the stock harness etc. and
allows a big airfilter to be placed under the headlight for a fresh air
intake which is also available as done on Kevin Tan's car which I'm sure
he'll have on his website as well. Any questions let me know. For those
that are interested in the future let me know, I need to know in advance
to get on my fiberglass guys case since he always takes so long.
Date: Fri, 16 Jan 1998 22:08:37 EST I was delighted to discover that the '93+ Rx7s accomodated high-performance H4
bulbs in the OEM housings. I started using high-performance lights (Hella,
Carello and Marchal reflectors with H3 and H4 bulbs) in Rx2s and Rx3s, and
have had 55/100w bulbs last as long as five years in some applications. I find
the twin-turbo's low beams to be good when aimed properly (30" of height at a
distance of 100' on a level surface), with the highs providing exceptional
visibility.
I installed a set of PIAA 1200 driving lights a year ago. They provide superb
lighting under all circumstances, and are virtually inconspicuous due to their
small size. The kit was less than $200.00, which included the lights, mounting
hardware, harness, relay and switch.
Prices are as follows:
EuroLights are direct replacement (no mods required) specially coated
bulbs made in Germany by Sylvania, Wagner, and GE that are used in Europe.
They are OEM spec...they just offer a very clear white light (instead of
the standard yellowish light from original equipment bulbs here in the
US)...and they have a distinct blue glow that looks very similar to the
ones on the new Benz's.
________________
Date: Wed, 15 Apr 1998 01:39:51 -0700 Also, the guy who was advertising his EuroLights company, gave you a bad URL.
It's EuroLights now. They seem to only
sell bulbs, but I'm going to send them some email tomorrow about the Hella
housings.
Bear with me while I elaborate a bit. I called Hella in Georgia, their US
main site. The guy I talked to was very helpful and said there is nothing
they have specifically made for the 3rd gen. So I don't know what the AOL guy
meant by a replacement housing. Maybe for a 1st or 2nd gen? Also, the lights
in the 3rd gen are not sealed beam the way he says! Very suspicious...
I'm hoping someone will have a line on the Japanese OE lamps.
Also, here's a little blurb in there from me about my install of PIAA and
Hella driving lamps. It's on my
web page.
________________
Date: Thu, 20 Nov 1997 10:49:01 -0500 I installed a couple of super bright headlight bulbs (advertised in
AutoWeek for $18 a pop) last night. I got the 55 watt low/100 watt high
bulbs. The low beams are very close to stock brightness but the highs are
much brighter and visibility is awesome. I recommend them. The procedure to
replace the bulbs is in the owner's manual [3] and realize it's going to be
a pain in the butt to get the headlight covers lined up again with the
surrounding body panels.
While I was at it I re-aimed the headlights. The stock aim job on my last
gen was really crappy. I highly recommend you raise your beams a little if
you're suffering from a lousy light pattern I had. It helps if you can
disconnect one headlight (or cover it with a towel) so you can see what
each headlight is doing. Be sure to use the brights to adjust the
headlights left and right (I had a good looking low beam set up and checked
the brights and I was aiming way left). With the new bulbs and improved aim
I can finally see at night (and no one has flashed me yet for blinding
them).
________________
Date: Fri, 21 Nov 1997 20:10:59 +0000 J.C. Whitney sells the same bulbs for $9 each. I put a set of 90/130
watt bulbs in my 3rd gen... Low beams are fine, I never get flashed
by other drivers. High beams are like a row of rally car Hella's up
front! On straight roads, I can see the next mile marker lit up, as
I'm passing the first one. ;-) Each bulb pulls 10.5 amps and the
3rd gens headlight circuit is rated at 30 amps. Wiring doesn't get
any warmer than stock. (Stays very cool)
_________________
Date: Thu, 15 Jan 1998 11:26:20 -0500 As far as the bulb is concerned, the 3rd gen's use the std. 9003 style
bulb. I recently replaced the bulb with bulbs I ordered from JC Whitney.
They are "Super Powerful Replacement Off-Road H-4 Quartz-Halogen Bulbs"
90w/130w, part #71FZ9791R, $11.95 each.
It took about 3 days to get them and about 20 min each side to change. What a
difference they made. The headlight circuit in a 3rd gen is rated at 30
amps and these are 11 apm bulbs so there is no problem upgrading to
them. I have had no-one "flash" me because of bright lights. Keep in
mind these are not legal for street use.
__________________
Date: Fri, 13 Mar 1998 16:30:32 -0500 The headlights you want to ask fo are the offroad H-4's. They
come in several different wattages- 100/165, 90/130, 80/100. I have the
80/100 and they work well. Another list member has the 90/130 and cant
believe the amount of light.
Depending on which issue (of the JC Whitney catalog) you have, in my
issue the Part #'s are:
You can upgrade the Fog Lights too with the H-3 Bulb
I took out the 35 and put in 55 watt, there is also 100 watt and 130
available.
__________________
Date: Tue, 24 Mar 1998 20:29:35 -0600 Correct, the H4's. I obtained mine through J. C. Whitney. Part number 71YV9791R
or 14YV9375A. Either is $11.95 per bulb. Both are 90/130. Phone number is
1-312-431-6102. Or through http://www.jcwhitneyusa.com/
___________________
Date: Mon, 11 May 1998 14:17:58 -0400 Go to trak auto or pep boys or whatever. Look for Motorcyle Headlights.
H4 style. 80/100 watt. 8.99
____________________
Date: Fri, 21 Jul 2000 10:43:31 -0600 If you put in halogen bulbs that are fed with wires too small the
voltage drop in the wire can cause the bulb to burn out prematurely.
Halogen bulbs must run at full temp. - full rated voltage.
The reason is to make this type of bulb work reliably several things
had to happen.
Hence the name quartz halogen. They do seem to work best with the
electrical system operating at its' higher end (14.5 to 15 Volts).
They are also more vibration resistant due to the thicker filament.
For a quick fix just run another wire in parallel with the stock one.
Use 14 gauge (or 12 gauge if you're running -very- special bulbs that
vaporize insects they illuminate ;-).
As long as you have a good high stable voltage supply to them, they
should operate well. Higher power bulbs almost always have a shorter
life, but there shouldn't be too much difference between 60W and 80W.
Now my theater projector bulb (LCD projector) is another matter - it's
250 Watt and rated for 2000 hours to half brightness (envelope gets
tungsten on it in spite of above and after 2000 hours it is
"dangerous" to continue to use it so the electronics is designed to
shut it down). I'm told they tend to explode eventually, if used
beyond that point.
__________________
Date: Tue, 19 May 1998 15:23:13 -0500 Thanks to everyone who replied to my inquiry about upgrades for the
sealed-beam headlamps on my [1]. What I learned also applies to [2]
since they also use the round sealed-beam headlights. (and it may apply
to the [3] as well, at least as far some general info value. --Steve)
There are a couple of options for people looking for more light from
the headlamps. One option is the Hella "Vision Plus" DOT-approved
replaceable-bulb headlamps. These are drop-in replacements for the
sealed beams,use H4/HB2 bulbs, and have a beam pattern that is very
similar to the sealed beams (but brighter and longer range). The bulbs
are readily available from a number of sources in both standard
(60/55) and high (100/60 et al.) wattage. You can also get bulbs with
dichoric coatings and other options. Relays are highly recommended for
the high-wattage bulbs lest you fry your wiring harness. Cost is about
$80/set without relays.
Another option is the "E-code" (Euro spec) headlamps, which are *NOT*
DOT-approved and are therefore technically illegal for use on public
roads in the US. However I understand that the chance of actually
getting in trouble with these is pretty low. See
Dan Stern's FAQ at for more info on that subject. The E-code
lamps also use H4 bulbs but have a beam pattern with a very sharp
cutoff at the top and a 45 degree rise to the right, so that roadside
signs/pedestrians/parked cars are illuminated. Hella is the only brand
of E-code lights commonly available in the US. A couple of people say
that other brands (such as Cibie and Marechal) are "better" than the
Hellas but they are no longer officially imported into the US (Dan
Stern says he can get Cibie, see the webpage listed above). Price for
the Hellas is again about $80/set, the other brands are about twice
the cost of the Hellas.
NB: Proper aiming is critical due to the increased light output of
either set listed above. Don't blind the guy in front of you!
I think I'm going to try a set of the E-code lamps from Imparts (which
happens to be located in my fair city) and see what happens.
_______________
Date: Wed, 19 Jan 2000 19:27:19 -0800 You should check out http://www.overboost.com.
They did a test of these bulbs and found them to be worse than stock civic lights.
______________
Date: Sun, 3 May 1998 10:38:16 -0400 >Date: Sat, 02 May 98 16:29:06 -0700 While not quite as ambitious, I've got a circuit involving a time-delay
relay (TDR) that replaces the headlight retractor relay and causes the
headlights to pop-up automatically for flash to pass, and remain up for
a couple seconds in case you wish to flash multiple times without
bobbing the headlights up & down.
If you or anyone would like a schematic and description of the circuit,
send me private E-mail. The major cost of this project is the TDR -
probably running about $35-40 by now.
_________________
Dave responds to someone's request on how to get the low beams to stay
on at the same time as the highbeams. --Steve
Date: Thu, 29 Jan 1998 08:20:54 -0700 () Just add a diode from the high beam filiment wire to
the low beam wire. high beam wire ->|- low beam wire You
will have to use a power diode, I recommend a 10 Amp to be
safe, mounted on a small heatsink (each diode will
dissipate about 5 Watts). Actually, on further thought,
you should need only one diode, so use a 15 to 20 Amp
diode and heatsink it for 10 Watts dissipation (the two
sets of lamps are in parallel unless you have headlamp
winking ;-). The low beams will run 1 Volt less than the
highs, but this is probably good (they'll last longer). You
may overheat single bulb dual filiment bulbs doing this,
but four lamp systems will be ok.
Date: Sun, 3 Jan 1999 18:11:09 -0500
From: "David Ieroncig" (Rx7@Rocketship.com)
Here is a "enlightening"
source of information concerning
general automotive lighting. (Definately "bookmark" material IMO.)
If this post can save the list from the recurring and impending "Blue
Ion zenon gas specially coated and paint dipped mega-super-dooper
hi-performance gold plated ceramic based bulbs; Are they worth it
and are they legal?" posts, I'll consider my 1st trimestrial list
obligation of the year as fullfilled.
_______________
Date: Sun, 18 Jul 1999 13:21:15 PDT Let's separate Xenon lamps for what you're REALLY refering to here... True
High Intensity Discharge lighting systems (H.I.D) use Xenon as the major gas
within the lamp itself. This noble gas is then excited by a very high
voltage between an annode and cathode that are separated by a gap. This gap
then arcs (like professional sports stadium arc lamps) to produce light.
Essentially, you have a quarter inch bolt of lightning.
These are entirely different from incandescent lamps which burn a tungston
filament in a vacuum, Halogen lamps which burn a filament in a weak Halogen
gas charged near-vacuum, and the Xenon charged Halogen lamps that you're
talking about which burn a filament in a weak Halogen gas charged
near-vacuum that also has traces of Xenon to improve the color of the burn.
Just about every car on the road has Halogen lamps which produce a much
whiter light than the brown light that Edison's incandescent bulbs generate.
But Halogen bulbs are still yellowish. A Xenon charge brings them whiter.
True HID systems burn white (~4800 K). They produce sunlight quality light.
The ones that are in all automotive applications (that I know of) are D2S
bulbs that are driven from a ballast that bumps the 12 volts supplied by
your car to 20,000 volts (at 35 watts) to power the bulb. That is how they
can produce much more light (rougly one million candlepower) at 35 watts
than conventional 55/65 watt Halogens (roughly 350,000 candlepower). These
numbers are dependent on the housings, of course.
>On the cheaper cars (BMW 3 or MB C class) they are about a $1500 This is for true HID.
>Those replacement bulbs DO fit the stock systems but you can also If you are refering to the non HID "Xenon-charged" bulbs, then yes, you can
get slightly whiter light and, if they are of a higher wattage, brighter
light. Remember that over 90 watts, you should be running relays, not just
replacing bulbs. You might melt your wiring.
>No Joke each power supply is about 20 lbs for ~150watt bulb.
Luckily, there are smaller balasts for automotive HID use. They range from 5
pounds for the ones I used on my original headlight kit prototype to about 1
pound for the ones I'm using now.
>For actual xennon lighting I think it actually requires an entire How true.
>Perhaps someone more familiar with lighting could chime in on The "joke" bulbs are just Halogens dipped in blue dye. I *hope* no one on
this list would ever think that you can get an HID kit for $19.95!!! These
are for the Honda boys to put in their fog lights. You might get pulled
over for these as they are technically blue lights, reserved for police use
only. The HID systems throw white light, not blue. The appear blue when
compared to Halogens yellow tinting, like my 200 pounds appears thin when I
stand next to my 300 pound friend. Stand me next to Tuck, and I'm a
whale...
>The actual xennon light look purple from a drving elevation of another car.
They throw white light, but they have a "dazzling" property to them that has
different effects on different people.
>Xenon bulbs in. I know they are illegal and all, but they make The HID systems are not illegal, neither are Xenon-charged Halogens, which
still produce a yellow light, just not as yellow as straight Halogens. If
you want to put the "joke" blue lights in, you will LOSE illumination, not
help.
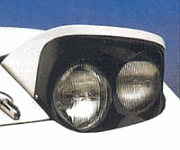
The Knight Sport headlight cover is shown above. I don't know how effective this is in
terms of getting air into the engine compartment, but it looks cool.
The FEED cover is shown below.
The C-West cover is shown below.
All are available from
Rotary Xecret.
>I want to know if the original Mazda foglights can be put onto an Should be pretty easy to do. The wiring harness may not be there on non-Touring models like the R1,
but that should not be a big deal.
You can buy the fog light rocker switch that sits in the center console (next the to the rear defogger) from
the dealer for like $40. Run wire from the switch to the lights and battery if the wiring harness does not have
this already on your R1. The mounting holes are already on the front bumper. The only tricky part would be
if there is a relay in there that would be required to step down/up the voltage or current.
And maybe wiring in to the ignition, but I don't know if the factory ones were wired in, or if Mazda just relied
on the driver being smart enough to turn off the fog lights when they shut off the car. You might even be able
to wire into the headlight circuitry for current, then you wouldn't have to worry about the relay. Just make sure
the switch is wired in after the headlights, so they don't come on automatically when your headlights come on.
__________________
Date: Fri, 27 Mar 1998 11:31:46 -0800 I did buy a set of PIAA 1000X driving lamps with their Super White color,
which is of course BLUE, so I've got a pair of Hella Micro FF's on order.
Date: Tue, 24 Mar 1998 23:02:01 -0800 There is a company called Stongard, based in Washington State somewhere, that
has this superthick urethane stuff they stick on your lights. It's pretty
high quality stuff. www.stongard.com last time I checked. I had their "bra"
on my ex-M3 and it was great. Couldn't even tell it was there until I hit
something and it absorbed it all.
The tail lights on the '99 (Japan) RX-7 are round. These can be ordered and bolted on,
no problems. Wael posts the part numbers:
Date: Fri, 24 Sep 1999 16:46:40 +0000 The part numbers are Mazda Japan numbers,
F 132 51 180 ___________________
Or you could just get a decent body shop to mask off the circles and spray the lens covers the
color of your car. --Steve
___________________
Date: Fri, 30 Jun 2000 14:49:13 -0400 I measured them the best I could. The 2 red brake lights are between 3 1/8"
to 3 3/16". The turn signals are between 3" and 2 7/8" (its tough to measure
because it curves)
The circles are on center of each bulb.
___________________
Several companies make a panel (fiberglass?) that fits over the tail lights and
leaves only round holes showing through. The pictures I have seen of these look
like they don't fit very well, but maybe those were poorly made knock-offs of an
original piece. I think Mazdaspeed may be the original source. --Steve

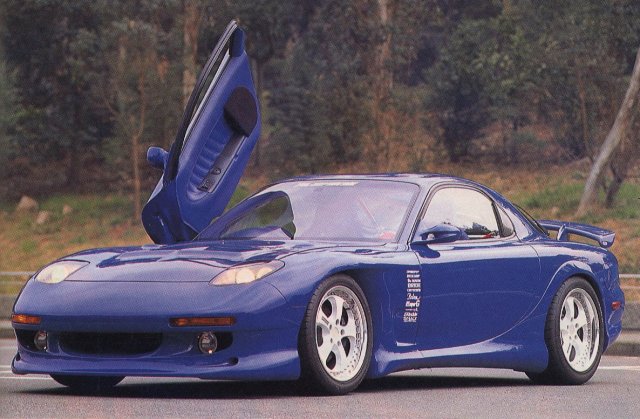
RE Amemiya
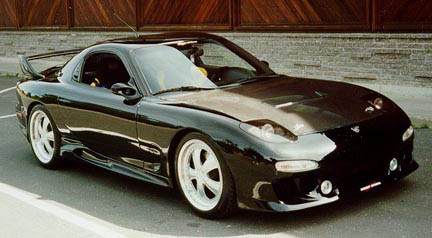

RE Amemiya
C-West


East Bear
Average cost $600

R Magic
Attain
Knight Sport
RUN Racing

Unknown
ASP
Average cost N/A
From: "Kevin T. Wyum" (aspi@winternet.com)
Upgrade Stock Lights
From: Banzai Rx7 (BanzaiRx7@aol.com)
  Hella Replacement Housings TypeH6024 $49.00 each
  EuroLights Replacement (blue/white) Bulbs TypeRB2: $22.00each
  Plus $12.00 for UPS COD Shipping
From: Gene Kan (genehkan@scam.XCF.Berkeley.EDU)
From: "Robinette, Maj Robbie D." (RobineRD@x1.mcguire.af.mil)
From: "Dave Girvan" (fd3s@sprynet.com)
From: Greg Smith (gregs@perigee.net)
From: Rippin (rippin@pottsville.infi.net)
71BF9791R-90/130   $11.95
71BF9790A-80/100   $8.99
88BF6043R- 55 watt   $3.59
88BF8155R- 100 watt  $5.95
From: Martin Crane (m.crane@worldnet.att.net)
From: Scot Kight (skight@enterprise.reliacom.com)
From: dbeale (dbeale@harddata.com)
Subject: Re[2]: (rx7) [3] 80 watt headlights
From: James Scott (jls@stl-online.net)
From: Josh Ross (suppersppy@earthlink.net)
Subject: Re: (rx7) (3) PIAA SuperWhite experience?
> The previous owner of my 7 bought a set of PIAA superwhite halogens, but
> never installed them.  He got the 60/55 watt H4 lamps for the main
> headlights and the 55w H3's for the fog lamps.  Anybody had any
> good/bad/terrible experiences putting the 55W bulbs in the fog lights?  The
> original fog lamps were only rated at 35W, will the wiring/relays hold up
> without an upgrade?
From: "Houseman, Carl W. x1323" (CHOUSEMAN@genicom.com)
>From: Andrew Ghali (andrewg@netcom.com)
>
>I'm planning to rewire (snip) the "flash-to-pass" to turn
>on the fog lights or maybe the front markers.
From: David Beale (dbeale@env.gov.ab.ca)
General Lighting Info
From: "Jeff Witzer" (jwitzer@hotmail.com)
>option.
>use them on older cars and get "some" of the effect.
>new power supply etc. for the lights, not just a simple bulb
>replacement.
>this, but I don't think the replacements bulbs being sold are
>anything other than a potentially higher color temp normal halogen
>bulb with a little blue paint on them.
>a hell of a difference at night.
Headlight Covers
Driving/Fog Lights
>R1---if not prewired,how difficult is it to install? I would greatly
>appreciate a response even if you are not sure of this.
From: Gene Kan (genehkan@scam.XCF.Berkeley.EDU)
Lights Protection
From: Gene Kan (genehkan@scam.XCF.Berkeley.EDU)
Tail Lights
From: Wael El-Dasher (wael.el-dasher@efini.net)
F 132 51 170
From: Wael El-Dasher (wael.el-dasher@efini.net)
> Can you measure the diameter of the Efini ('99) Tail light holes and the
> distance between them? Can you measure the turn signal light holes as
> well. When I posted an inquiry to the list, I had all sorts of responses
> to people who wanted to perform their own mod like this. If you do this,
> can you please post it to the list?
Turn Signals
Corksport has clear turn signal lenses.
This is not my cup of tea as I think it looks "ricey", but what the heck, if
you like the look, go for it! --Steve
![[ Mail me ]](../mail.gif)
![[ To RX-7 Files home page ]](../rx7_home.gif)
![[ To my home page ]](../my_home.gif)
![[ Copyright Notice ]](../copyright.gif)